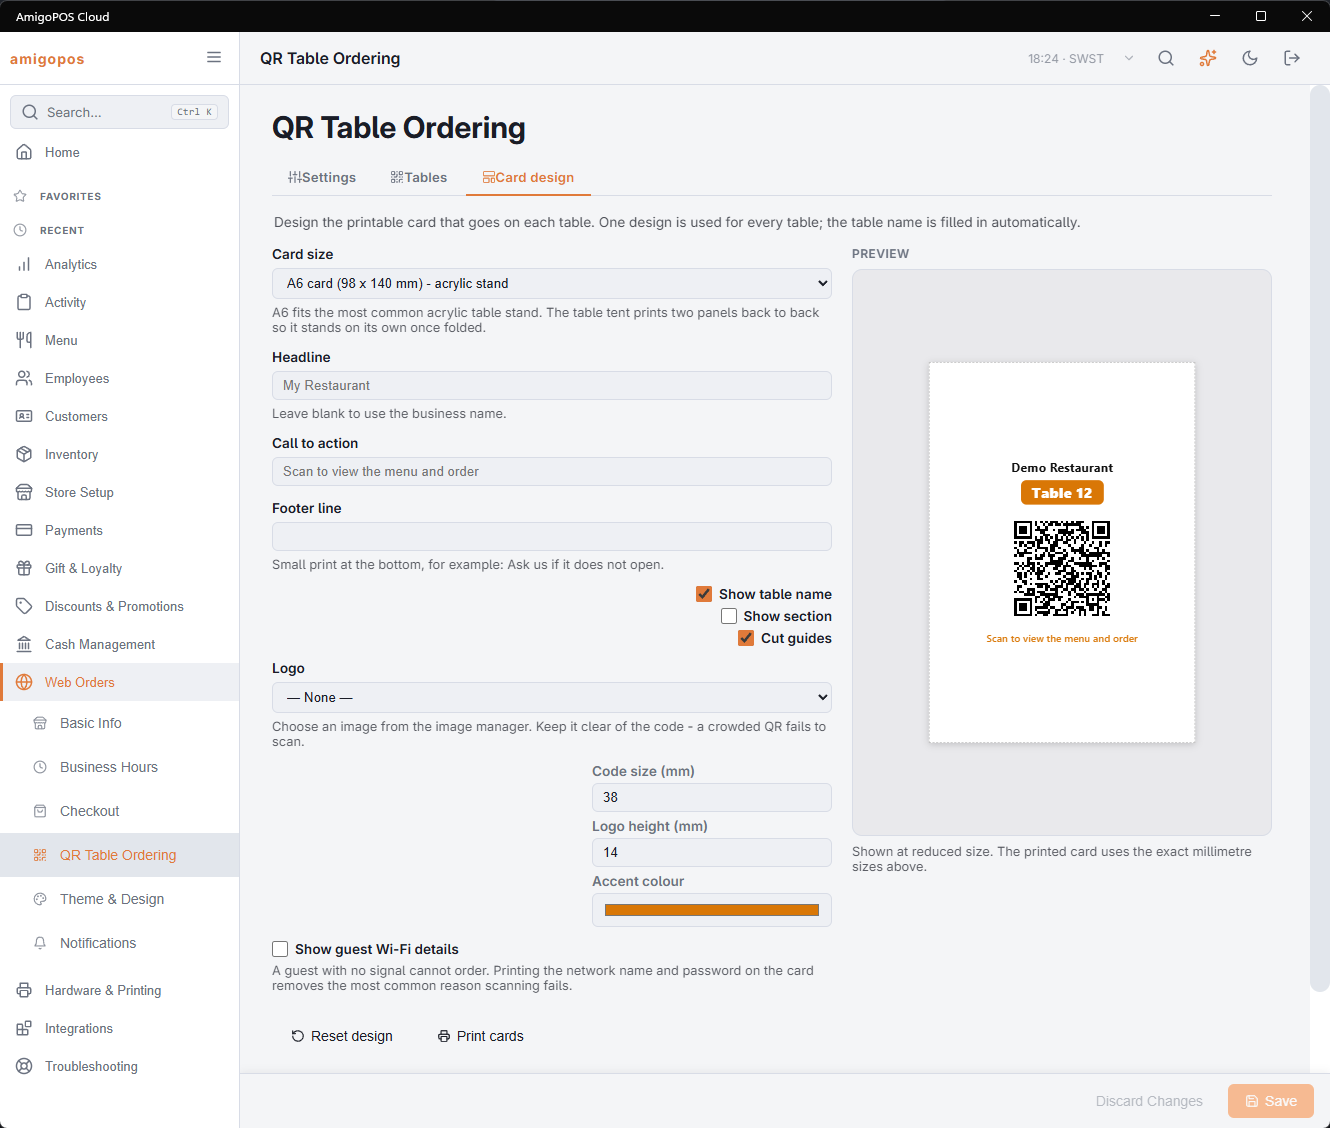
The Card design tab of Back Office › Web Orders › QR Table Ordering controls what the printed table card actually looks like. One design is used for every table; the table name is filled in automatically from the seating chart, so you lay the card out once and print the whole floor from it.
This is separate from the plain QR sheet on the Tables tab. The sheet is a contact sheet — every code on as few pages as possible, useful for reference and for checking your work. The cards are the finished article you cut out and put on tables.
Choosing a card size
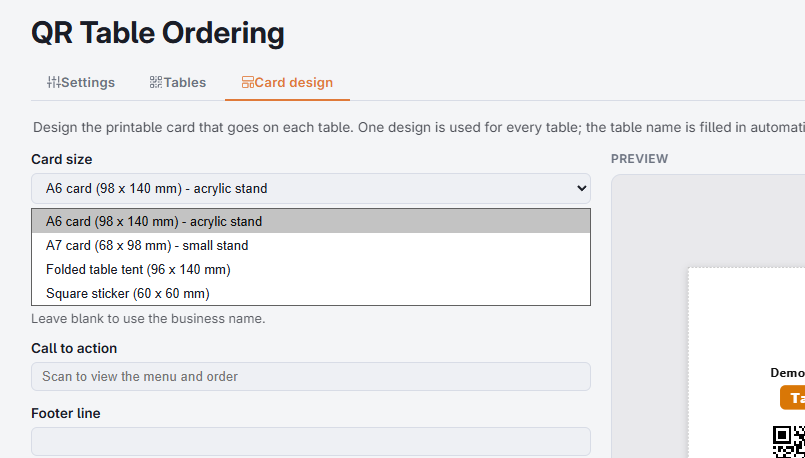
- A6 card (98 × 140 mm) — fits the standard clear acrylic table stand, which is what most restaurants use. Cheap, swappable, and the card can be reprinted without replacing the stand. Start here unless you have a reason not to.
- A7 card (68 × 98 mm) — the same idea in a smaller stand. Good for two-tops and crowded tables where an A6 stand is in the way of the food.
- Folded table tent (96 × 140 mm) — prints two panels back to back, one inverted, so the card stands up on its own once folded down the middle and reads from either side of the table. No stand to buy, but it gets greasy and you will reprint more often.
- Square sticker (60 × 60 mm) — for sticking flat to the tabletop. Can't be knocked over, stolen, or shuffled between tables, which makes it the usual choice for bars, breweries, beer gardens, and food halls. Print on adhesive label stock.
The fields
Everything updates the preview as you type. Click Save when you are happy; Reset design returns every field to its default after a confirmation.
Text
- Headline — the big line at the top. Leave it blank to use your business name.
- Call to action — the line under the code. Blank gives you “Scan to view the menu and order”. Keep it short and imperative.
- Footer line — small print at the bottom. A line like Ask us if it doesn’t open saves a guest waving at a passing server when something goes wrong.
What to show
- Show table name — leave this on. It is how staff and guests both verify the guest is ordering to the table they are actually sitting at, and it is how you catch cards that got swapped when the tables were wiped down.
- Show section — adds the seating-chart section under the table name. Handy when you are sorting a stack of freshly printed cards by area.
- Cut guides — dashed lines around each card so you know where to trim. Turn them off if you are printing on pre-cut stock.
Branding
- Logo — pick any image from the image manager.
- Logo height — 6 to 30 mm.
- Accent colour — used for the table-name chip and the call to action.
Code size
25 to 60 mm, defaulting to 38. Around 30 mm is the practical floor for a phone held at arm’s length; below that you start losing scans in dim rooms and with older phone cameras. Larger is more forgiving and costs you nothing but card space.
The white margin around the code is set automatically and can’t be overridden. Scanners need that clear border to find the code at all, so no amount of design pressure should tempt you to crowd it — which is why the layout won’t let you.
Guest Wi-Fi
Tick Show guest Wi-Fi details to print the network name and password on the card. Worth doing: a guest with no signal cannot order at all, so this removes the single most common reason scanning appears to “not work”. The values come from the guest Wi-Fi settings, so they stay in step with the Wi-Fi slip and anywhere else they appear.
The preview
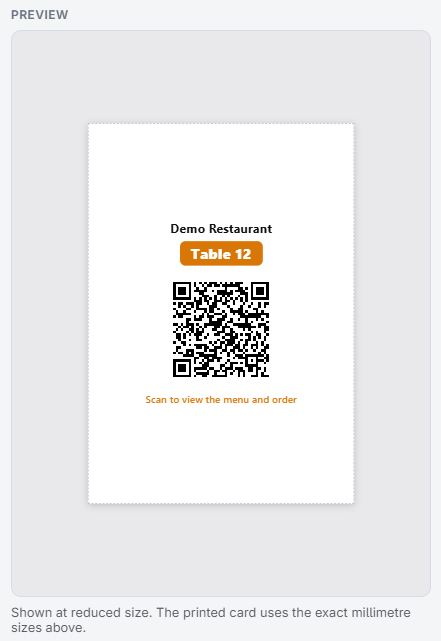
The preview is built by the same engine that produces the PDF, so what you see is what prints. It is shown at reduced size to fit the panel — the printed card uses the exact millimetre dimensions listed against each card size.
Printing
- Click Print cards. From the Card design tab this prints every coded table; from the Tables tab it prints the selected seating chart.
- The document opens in the usual preview window — print it, save it as a PDF, or email it exactly like any other report.
- To reprint a single table — after adding one table, or replacing one damaged card — use the small print button on that table’s row in the Tables grid rather than reprinting the whole chart.
Use matte lamination, not gloss. Gloss reflects overhead downlights straight back into the phone camera, and a card that scans perfectly on your desk can be unusable under the lights above table 12. This is the most common cause of a card that “works sometimes”.
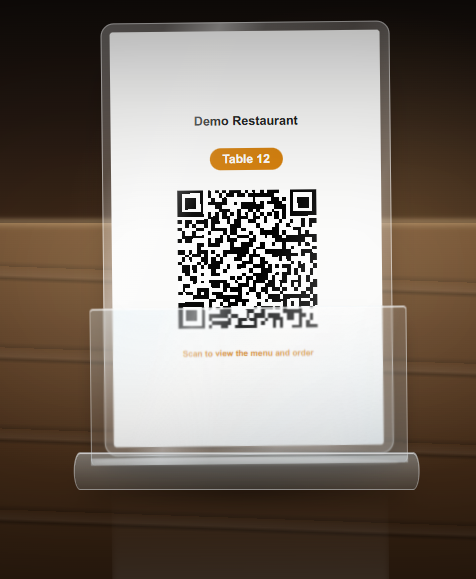
Print on card stock, laminate, and slide into acrylic stands. Before doing the whole floor, print one card, laminate it, and scan it at the actual table under the actual lights — at arm’s length, not from six inches away. Fixing the design after printing eighty cards is a bad afternoon.
When you change the design
The design is stored separately from the codes themselves, so changing the layout, logo, or colours does not invalidate anything. Existing printed cards keep working; you simply reprint when you want the new look on the floor. Only regenerating codes on the Tables tab kills printed cards.