Reciting a sixteen-character Wi-Fi password across a noisy dining room is nobody’s favourite part of service. Configure the guest network once and the POS can print it — as a slip a server hands over, automatically with certain order types, or as a scan-to-join code on the receipt.
1. Configure the network
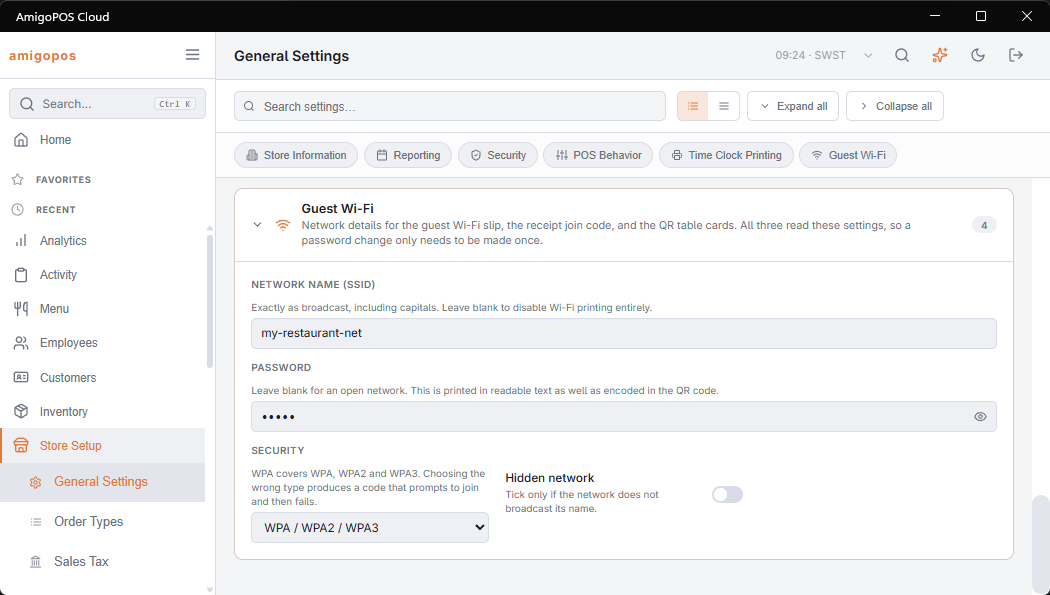
Open Store Setup › General Settings and expand the Guest Wi-Fi section. Four fields:
- Network name (SSID) — exactly as it is broadcast, including capitals. Leaving it blank disables Wi-Fi printing everywhere.
- Password — leave blank for an open network. It is masked on screen, but it still prints in readable text on the slip.
- Security —
WPAcovers WPA, WPA2, and WPA3 and is what you want in almost every case.WEPis for genuinely old equipment.nopassis an open network with no password. - Hidden network — tick only if the network does not broadcast its name.
Printing the credentials makes them portable — a slip in a pocket works from the car park. That is fine for a guest network that is properly isolated, and not fine if guest Wi-Fi shares a network with your POS stations, kitchen displays, or print agents. If you are not certain which you have, ask whoever set up your network before switching this on.
Changes take effect immediately — print a test slip straight after saving to confirm the new details came through.
2. Choose how it gets to the guest
Three routes, and they work happily together.
On demand from the POS
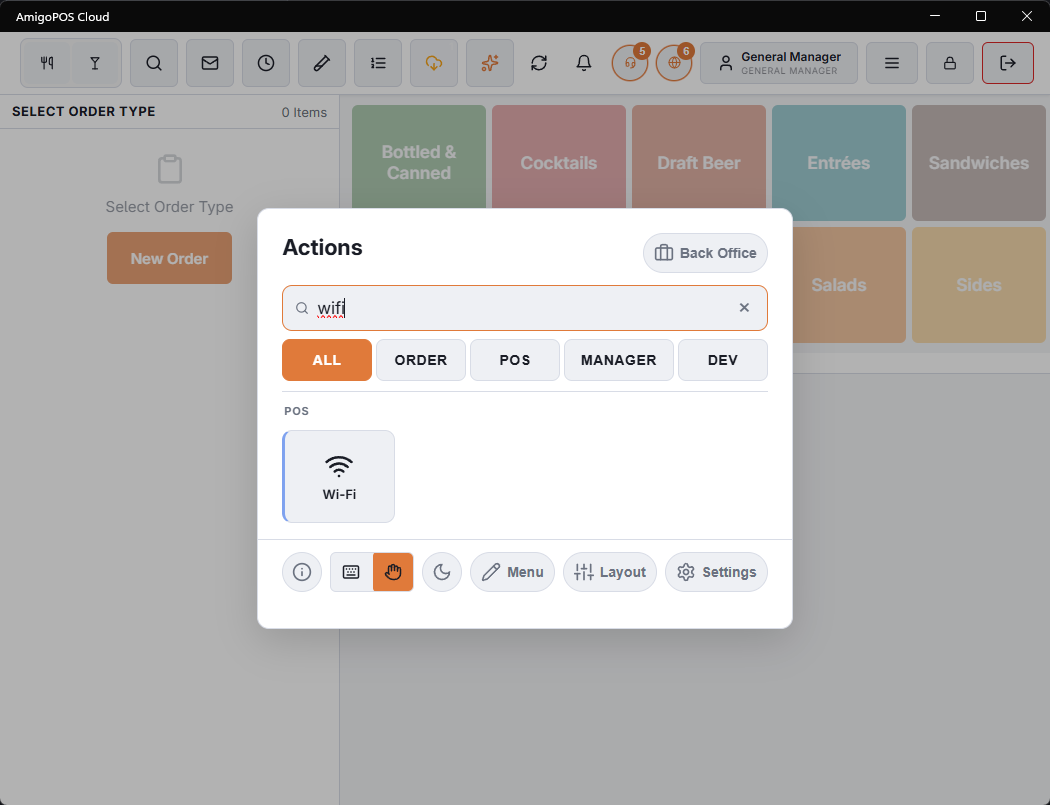
A Wi-Fi button in the POS More Menu prints a slip immediately. This is the everyday case: a guest asks, the server taps once, done.
Automatically, for chosen order types
Add the Print guest Wi-Fi slip action to an order type under Store Setup › Order Types › Workflow, in the After The Order Is Sent stage. The first time an order of that type is sent, a slip prints alongside the food; sending more items later doesn’t print another.
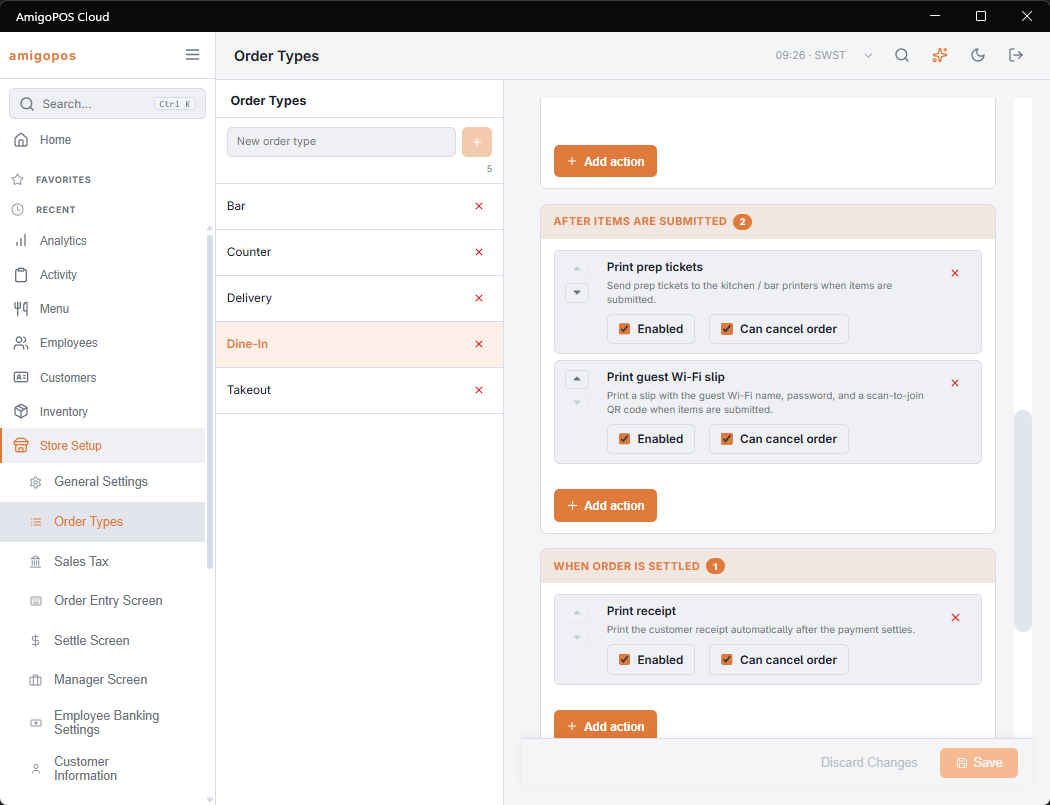
This is aimed squarely at counter service and coffee shops, where the guest orders at the counter, takes their receipt and their food, and then sits down — exactly when they want the Wi-Fi. Because it is set per order type, you can give it to Counter and Dine-In while leaving Delivery and Takeout alone.
The slip does not reprint when an order is recalled. A guest adding a second round already has one, and reprinting every time wastes paper and confuses the counter.
On the customer receipt
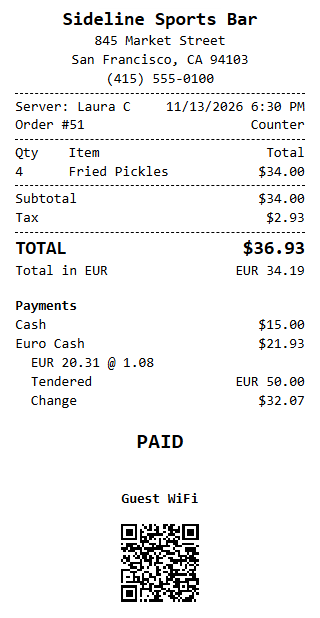
Add the {WifiQRCode} token to your customer receipt template for a scan-to-join code at the bottom of every receipt. One caveat, handled automatically: if you also use QR pay-at-table, the Wi-Fi code is suppressed on any receipt carrying a payment code. Two codes centimetres apart on an 80 mm receipt are both in the camera frame at any realistic distance, and a guest who scans the wrong one concludes your payment link is broken.
3. What prints
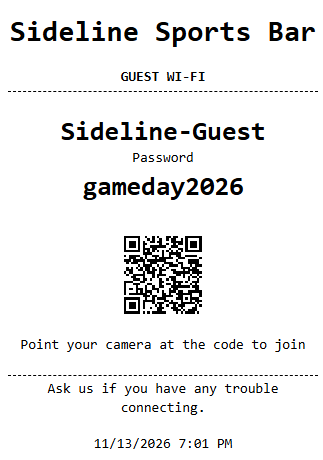
The default slip shows your business name, the network name, the password, and a QR code that joins the network when scanned. Modern iPhones and Android phones recognise the code with the plain camera app — no app to install.
The credentials are printed as readable text as well as encoded in the code, deliberately. Not every guest can use a Wi-Fi QR code, and a code with no fallback is worse than no code at all. Keep both if you customise the template.
4. Customising the slip
The slip is a full print template, editable under Hardware & Printing › Receipt Templates — choose the Guest Wi-Fi Slip kind. That means it can carry more than credentials: house rules, opening hours, your social handles, or a promotion. The guest holds this slip for the rest of their visit, which makes it a considerably better promotion surface than anything stuck to a table.
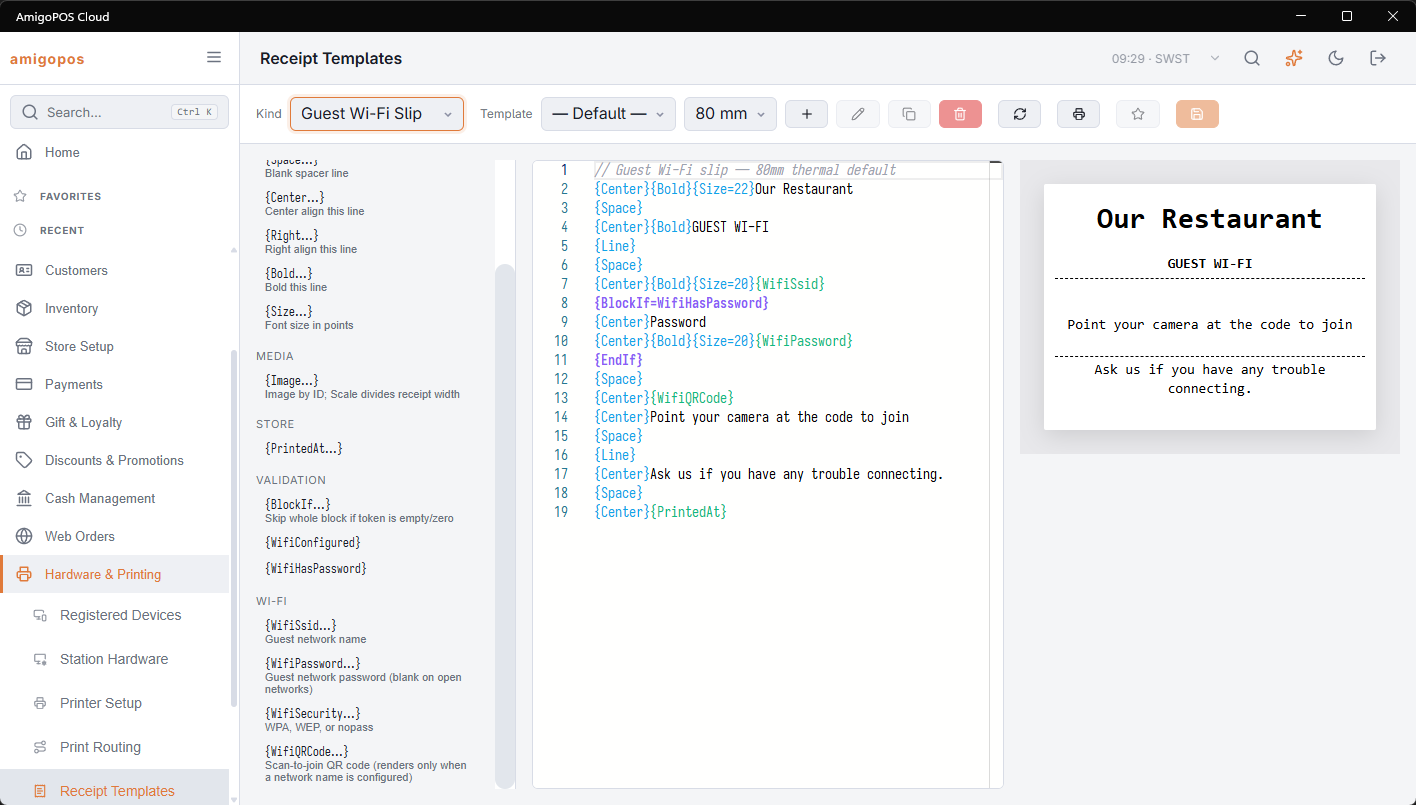
Tokens available to the template:
{WifiSsid}— the network name.{WifiPassword}— the password.{WifiSecurity}— WPA, WEP, or nopass.{WifiQRCode}— the scan-to-join code.{PrintedAt}— date and time the slip was printed.{BlockIf=WifiHasPassword}…{EndIf}— wraps a block that should only appear on password-protected networks, so an open network doesn’t print an empty Password heading.
Troubleshooting
The button reports success but nothing prints
Almost always no network name configured. The slip is deliberately suppressed rather than feeding blank paper, so check Store Setup › General Settings › Guest Wi-Fi first. Otherwise confirm your receipt printer is online with a normal test print — the slip goes to the receipt printer, not a prep printer.
The code scans but the phone won’t join
- Check the password for typos — the printed text and the code come from the same setting, so both are wrong together and neither will work.
- Check the security type. A network set to
WPAin settings but actually running WEP produces a code that prompts and then fails. - If the network is hidden, make sure the hidden setting is ticked; otherwise the phone looks for a broadcast network and finds nothing.
The code prints very large
Longer passwords need more data in the code, and more data means a physically bigger code at the same print density. A very long passphrase can produce a code that dominates the slip. Shortening the passphrase is the simplest fix and usually a fair trade for a guest network.
The Wi-Fi code is missing from receipts
If the receipt also carries a QR pay-at-table code, the Wi-Fi code is suppressed by design — see above. Otherwise check that {WifiQRCode} is actually in your receipt template and that a network name is configured.