Go to Back Office › Integrations › Uber Eats › Connection. The card at the top always tells you where you stand: not linked, linked but disabled, or connected and active.
Step 1 — authorise
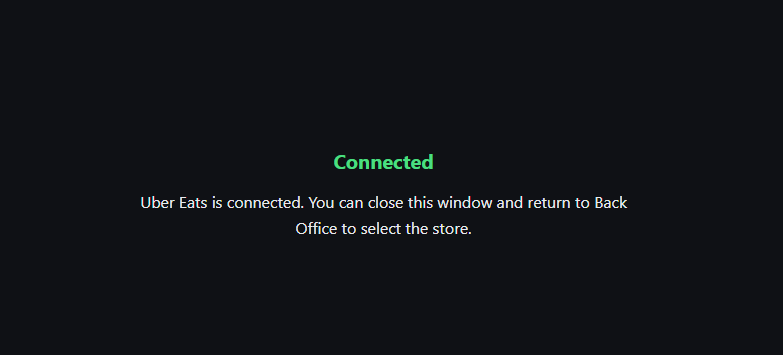
Press Connect to Uber Eats. A new browser window opens on Uber’s sign-in page. Sign in with the account that owns the store, and approve the request.
When you come back to Back Office, the list of that account’s stores appears below. It can take a few seconds. If it does not, press Load stores.
Step 2 — pick the store
Find the store in the list and press Link this store. If Uber Eats is not switched on for this store yet, Back Office first asks Enable Uber Eats? Choose Enable: orders are taken in and the menu is published only while it is on. Not Now links the store and leaves it off, and the tab then shows a notice with its own Enable button.
If the store list comes back empty
Some Uber accounts return no stores, or too many to find the right one. Copy the store’s ID from the Uber Eats Manager, paste it into Uber Store ID under the buttons, and press Link By Store ID. Uber still checks that the account you signed in with manages that store; if it does not, Uber’s answer is shown and nothing is linked.
Step 3 — check the result
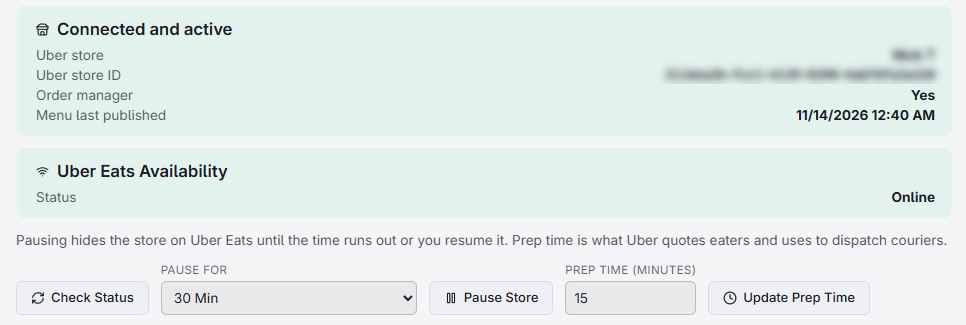
The status card should now read Connected and active and show the Uber store name and ID.
It also shows Order manager. This tells you whether CloudPos is allowed to accept, deny, cancel and mark orders ready for the store:
- Yes — staff manage orders at the POS.
- No — another app holds that role, or the store is set up so that Uber accepts orders automatically. Orders still arrive in the POS; only the order actions will fail.
When it reads No, a Request Order Manager button appears. Press it and CloudPos asks Uber for the role. The role usually lands after the next menu publish; if Uber records no order manager at all, the store is probably set to accept orders automatically and Uber support has to change it.
Integration settings
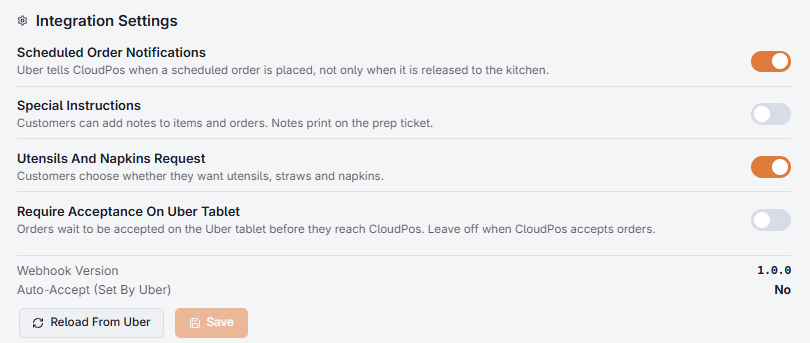
The Integration Settings card on the same tab shows settings Uber keeps for the store, read live from Uber each time the tab opens. Change a switch and press Save; Reload From Uber reads them again.
- Scheduled Order Notifications — Uber tells CloudPos when a scheduled order is placed, not only when it is released to the kitchen. Leave it on: it is what lets CloudPos check and accept an order for later as soon as the eater places it.
- Special Instructions — eaters can add notes to items and orders. The notes print on the prep ticket.
- Utensils And Napkins Request — eaters choose whether they want utensils, straws and napkins. When they decline, the order shows No cutlery.
- Require Acceptance On Uber Tablet — leave this off. When it is on, an order does not reach CloudPos until someone accepts it on Uber’s own tablet.
Below the switches, Webhook Version shows which version of Uber’s order notifications the store uses, and Auto-Accept (Set By Uber) shows whether Uber accepts orders on the store’s behalf. A store still on the Legacy version shows a Switch To Order API 1.0.0 button; switching affects only new orders, and switching back needs Uber support.
Turning the connection off
- Disable stops orders and menu updates but keeps the link. Use this for a temporary pause; Enable switches it back on.
- Refresh from Uber re-reads the store’s details. Useful if Uber support has changed something and Back Office still shows the old state.
- Disconnect clears the link and the Uber sign-in in CloudPos only. Nothing is sent to Uber, so the integration stays as it is on Uber’s side. If it is still enabled there, Uber keeps sending this store’s orders and they do not reach the POS — press Disable first, then Disconnect.