Google Analytics tells you what happens on your ordering site before the order: how many people looked, where they came from, which pages they left on. The point of sale already tells you what was sold; this tells you what almost was.
It is your Google account and your data. AmigoPOS only renders the tag.
1. Create a property
- Sign in at analytics.google.com with the Google account the restaurant should own.
- Admin › Create › Property. Name it after the restaurant, set the time zone and currency to match the store — the currency here is what your revenue reports are shown in.
- When asked for a platform, choose Web and enter your ordering site address (for example
order.yourrestaurant.com).
2. Copy the Measurement ID
Admin › Data streams, open the web stream you just made. The Measurement ID at the top right begins with G-.
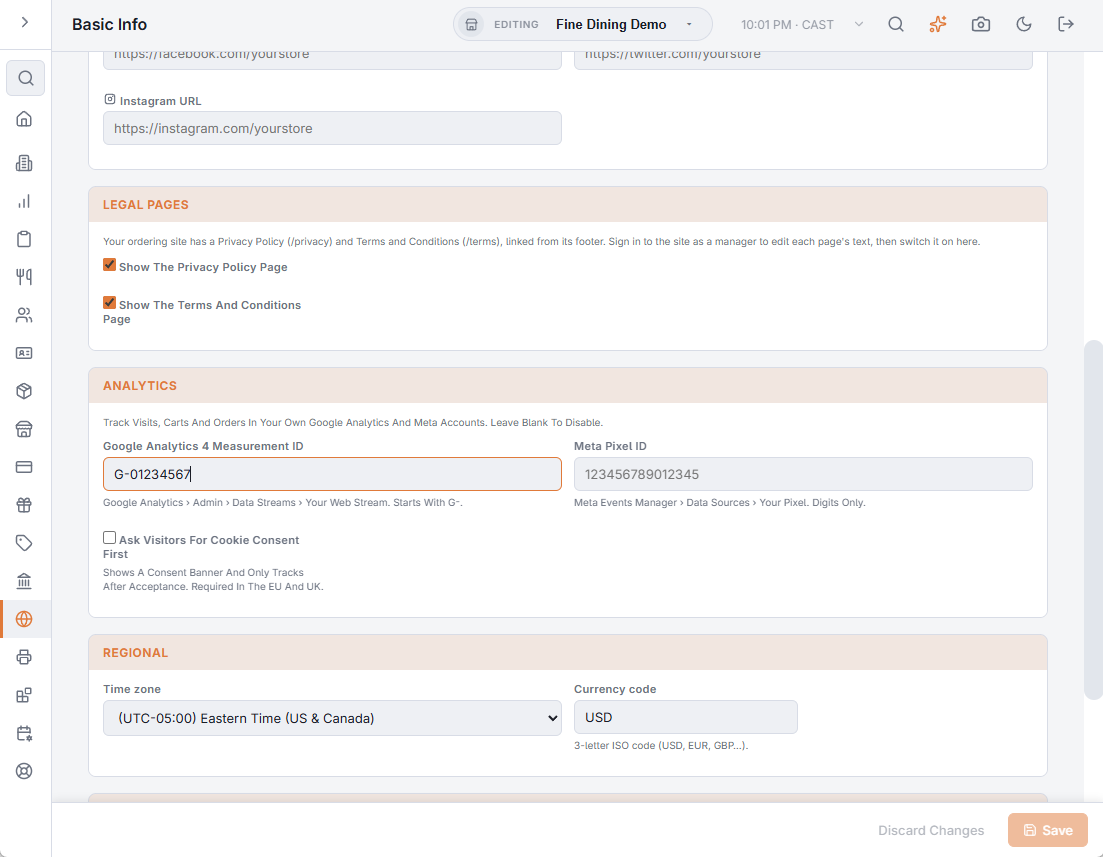
3. Paste it into the POS
Back Office › Web Orders › Basic Info › Analytics. Paste the ID, save, and reload your ordering site.
4. Check it is working
In Google Analytics open Reports › Realtime and load your site in another tab; you should appear within a few seconds. Place a test order and the purchase event follows it.
What is measured
The standard ecommerce events, so the built-in reports work without configuration:
- view_item — a menu item was opened.
- add_to_cart / remove_from_cart / view_cart.
- begin_checkout and add_payment_info.
- purchase — with the order number, the total, tax, delivery charge and every item sold.
That turns Monetisation › Ecommerce purchases into a list of your best-selling items by revenue, and Reports › Acquisition into an answer to “is the Instagram link actually bringing orders?”