A register works either as a POS station — the full till: orders, payments, drawers — or as a call center seat, which starts from the customer and sends each order to a store. It is one or the other; a register cannot flip between the two by itself.
The choice is made in Back Office › Hardware & Printing › Registered Devices, because that is where the store’s plan can be checked. It used to be a switch on the register; that switch is gone.
Switching a register
- Find the register in the list.
- Press To Call Center — or To POS Station to go back — and confirm.
- The register signs out. Whoever signs in next gets the other set of screens.
If it is the register you are working on, the confirmation says so: you are signed out as well.

When the button is missing or greyed
- To Call Center is offered only at stores whose plan includes the call center. At other stores the rows show nothing new.
- It is greyed, with the reason as its tooltip, when every call center seat of the store is taken.
- To POS Station is always available: a seat can always go back to being a till.
Adding a seat instead of converting a register
Generate an activation code with the role Call Center and enter it on the new device; see Activation codes and device limits.
On the register
More › Settings › License Status shows the register’s Device Mode, and only shows it. To change it, use Back Office as above.
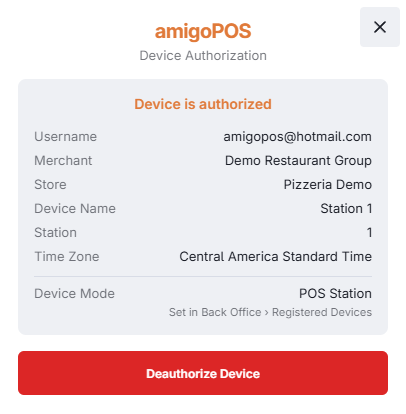
For what a seat does once it is one, see Taking a call-center order.
A seat’s own location
A seat is usually registered to an office rather than a store. The office is a store record of its own (no menu needed), and a seat’s Back Office keeps the pages that belong to it — Registered Devices, Print Routing, Caller ID — while hiding the store-bound ones. The office line, the office receipt printer and the seat’s copy of each order are set up there: The call center’s own hardware.