A call-center seat is usually not in a store at all: an office, a back room, a desk at home. Its hardware lives there too — the office phone line and a receipt printer next to the operator — and that hardware belongs to the office, not to the store the order is for. So the office is a location of its own: a store record like any other, with no menu needed, that the seats are registered to. Everything below edits that location.
Registering the seats to the office
Create the office in the admin console if it is not there yet (a store record; it needs no menu, no hours, no prices), then register each seat to it with the role Call Center — see POS station or call center seat. A seat still orders for the real stores through the store picker; only its own hardware is the office’s.
What a seat can set up in Back Office
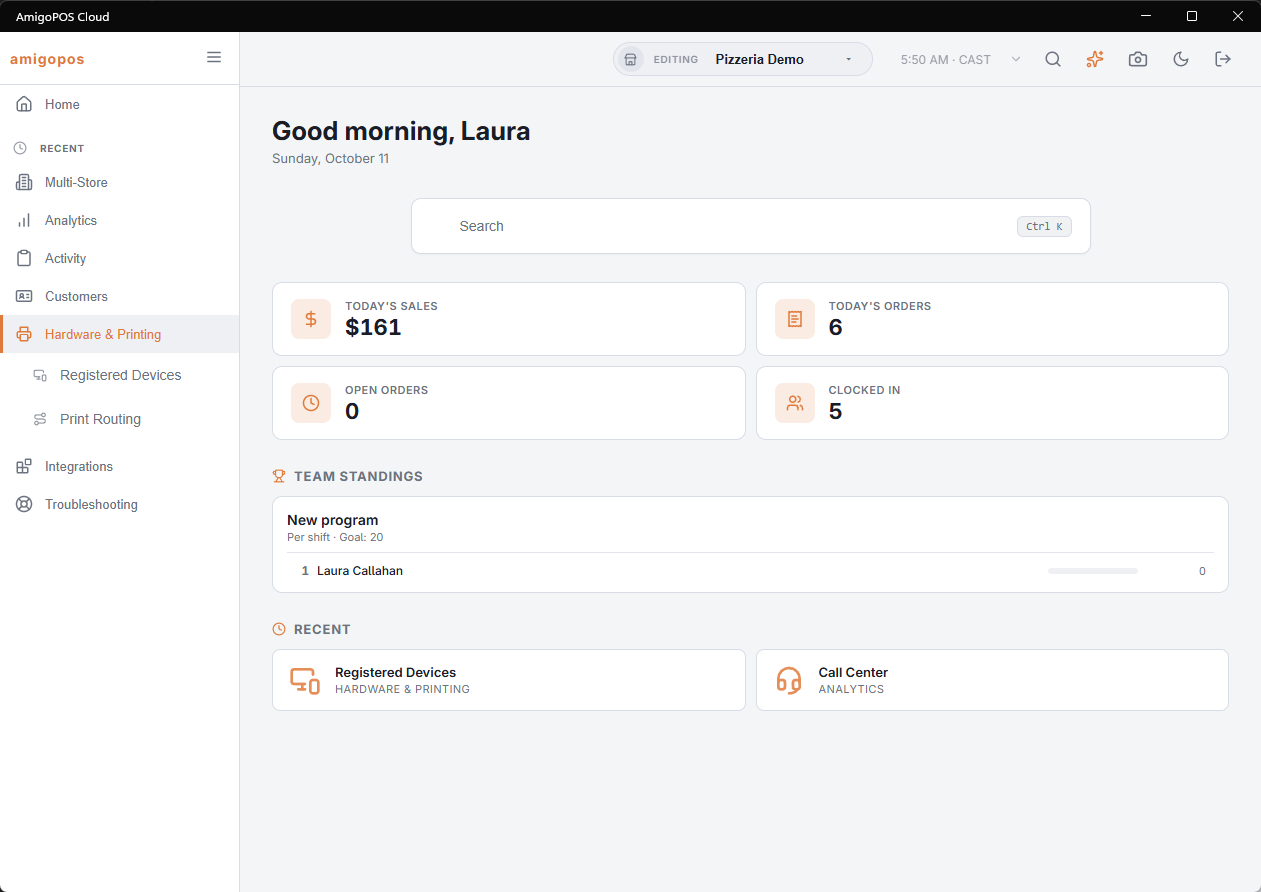
A seat’s Back Office hides the store-bound pages on purpose (menu, inventory, employees, store setup), because a seat has no store of its own to edit. It keeps the pages that belong to its location: Hardware & Printing › Registered Devices and Print Routing, and Integrations › Caller ID. They edit the office, which is exactly what the office needs.
Caller ID for the office line
Back Office › Integrations › Caller ID on the seat sets up the office line the way a store sets up its own — the username and password for the PBX, or the CallerID.com box, and Send Test — see Setting up caller ID in Back Office. Calls on the office line reach the seats; calls on a store’s line reach that store’s registers and the seats. A seat listens whenever caller ID is on anywhere in the business, so an office with no line of its own still rings for the stores.
A receipt printer at the office
The store still prints its own copy of every order; this is the seat’s copy, next to the operator. Three steps:
- Install the Print Agent on a computer in the office and activate it to the office location — the activation code comes from Registered Devices on the seat (see Activating an agent for the right store); add the receipt printer in the agent.
- On the seat, Back Office › Hardware & Printing › Print Routing: bind the Receipt slot to that printer, for the location or for the seat alone (Print routing).
- On each seat, More › Settings › Call Center: turn on Print A Copy Of Each Order Here.
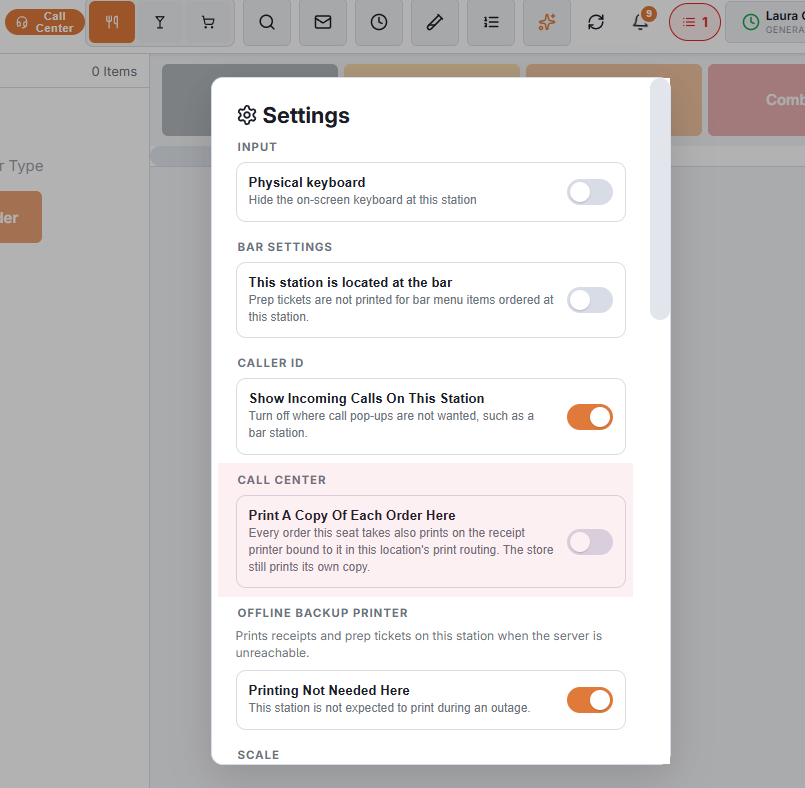
From then on every order the seat sends — pay at the store or on delivery, a pay link, a card by phone, Do Not Send — prints its receipt at the office as well. The receipt is the order’s: the store’s name, the store’s receipt layout, the store’s prices; the paper simply comes out where the operator sits. A later release from Do Not Send does not print it again, and a missing printer never stops an order going out — it only logs a warning.
The number of copies follows the office’s own Print Routing (its Receipt slot’s Extra Copies), not the store’s.