The connection is set on the Settings tab of Back Office › Integrations › 7shifts. Each setting saves as soon as it is changed.
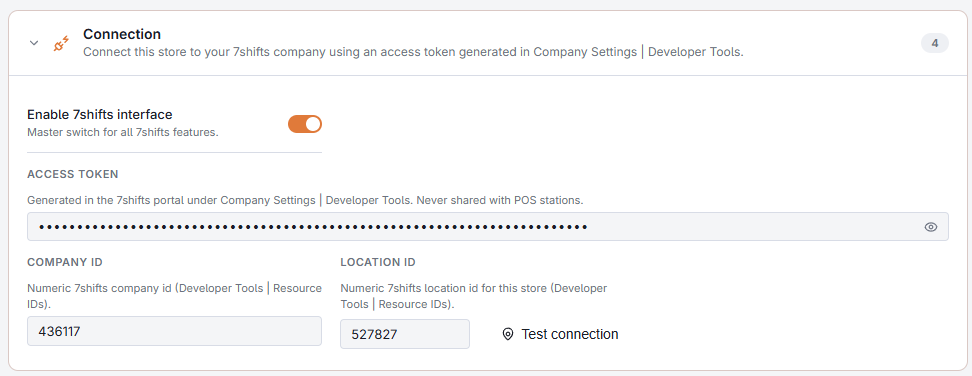
Step 1 — Connection
- In 7shifts, open Company Settings › Developer Tools and generate an access token. Under Resource IDs, note the company ID and the ID of this store’s location.
- Paste the token into Access token. It is kept on the server and never sent to the registers.
- Enter the Company Id and the Location Id, both numbers.
- Switch on Enable 7shifts interface, the master switch for everything on this page.
- Press Test connection. A message confirms the connection and names the 7shifts account and location it reached.
Check that the location named by the test is this store. A wrong location ID sends this store’s hours and sales into another location’s figures.
Step 2 — Map jobs and link employees
Before switching on any flow, map the store’s jobs to 7shifts roles and link the employees. See Linking jobs and employees.
Step 3 — Switch on what you need
Each flow has its own switch, so the integration can be introduced one part at a time.
| Section | Setting | What it does |
|---|---|---|
| Time clock | Send time punches | Sends clock ins, clock outs, breaks and declared cash tips. See Time Punches. |
| Breaks are paid | Breaks sent to 7shifts are marked as paid. | |
| Schedule enforcement | Checks the 7shifts schedule at clock-in. See Schedule Enforcement. | |
| Grace period (minutes) | How many minutes before a scheduled shift an employee may clock in (0 to 60, default 15). | |
| Sales | Send sales receipts | Sends each order as a sales receipt, for 7shifts’ labour forecasting. Off by default. See Sales Receipts. |
| Diagnostics | Transaction logging | Saves each request to 7shifts and its answer in the transaction log on the Activity tab. Use it during setup only. |
Verifying
Clock one linked employee in and out, then check the punch in 7shifts. If it does not arrive, open the Activity tab: a failed request shows the reason. See 7shifts Troubleshooting.